By Wojtek Piaseczny
Introduction
This is an example of how to build an ASP.Net LDAP authentication application using ADAM.
Microsoft's ADAM (Active Directory Application Mode) is a popular LDAP server for application developers. It's free, easy to install, and can "grow up" into full-blown Active Directory. It is also a simple to use if your application is running in a Windows-only environment with NTLM authentication.
However, many LDAP applications have clients that run on operating systems other than Windows and Windows clients that are not on the same domain as the server. When ADAM is configured for those types of scenarios it becomes harder to use because it requires a few additional administration settings and some extra code to connect to it.
This article describes how to configure ADAM for regular LDAP communication and build a boilerplate ASP.Net application on top of it. We will use an LDAP client which does not use NTLM authentication, to show that this can be done with any client and on any platform.
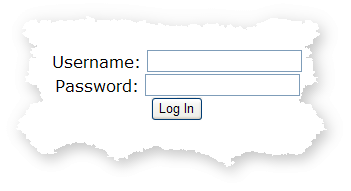
At the end of this tutorial you will have an ASP.Net application capable of authenticating users against a directory,
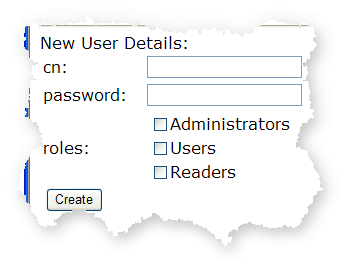
creating new users,
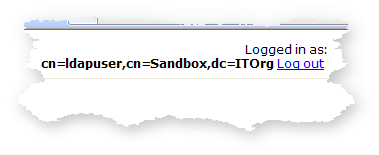
and displaying the credentials of the active user.
NOTE There are subtle differences in how ADAM behaves on Windows Server that is part of a domain, a Windows Server that is not on a domain, and Windows XP. This sample is based on ADAM running on Windows XP. On Windows Server additional steps may be necessary to make this sample work.
Prerequisites
In order to run this sample you will need:
Creating an ADAM Directory Instance
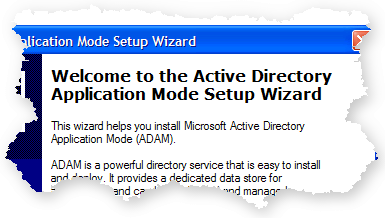
After downloading and installing the prerequisites above, create an ADAM directory instance using all of the default settings. Start the ADAM setup wizard by clicking Start->All Programs->ADAM->Create an ADAM instance.
Create a new instance.

The instance name is arbitrary.

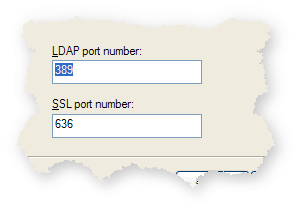
The default LDAP port is 389. If this is already taken by another instance we can just pick a different one.
Create a partition for your application data. By default ADAM will not create a partition because applications are expected to do that on their own but our sample doesn't have that need.

Select the installation directory.

Again, to simplify configuration use Network Service account as the service account.

Add yourself as the initial administrator of the LDAP Instance.

Select which LDIF files to import. These files contain schema definitions and describe what kind of data you will be able to store in your directory instance. You can import more LDIF files later and for now all we need is user information.

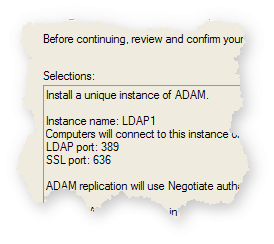
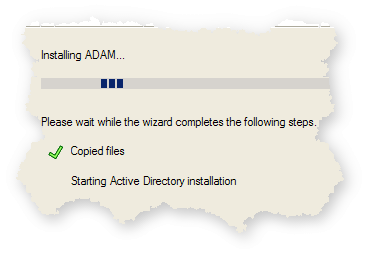
Click next on the summary page and sit back while ADAM sets up your LDAP instance.
When this process is done you will have an empty directory with the MS-User schema installed. You will be able to connect to it only with ADSI and only as yourself. Next, we'll put some users into the directory, and after that we'll use those users for authentication into the directory itself.
Intermission
At this point we have to make a configuration change in order to loosen up some locked-down default settings: we will need to enable user password changes over non-SSL connections.
Why do we need to do this? Because we want to create users in ADAM, we want to give those users passwords, and we don't want to set up SSL. If we wanted ADAM to use Windows principals (such as domain users) for authentication to the directory then we would not have to do make this change, since ADAM would not be storing passwords (or users, for that matter). But since the very point of this exercise is to decouple ourselves from Active Directory and NTLM, and because we want to avoid the extra complexity of setting up SSL, we will disable the security setting which prevents password operations over non-SSL channels.
While a pain in development and prototyping environments, this secure configuration is something that you should use in production servers. In those cases you should configure SSL instead of disabling this setting. As a bonus, however, this gives us a chance to introduce one of the indispensable ADAM tools: ADSIEdit.
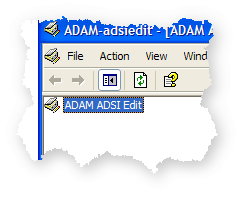
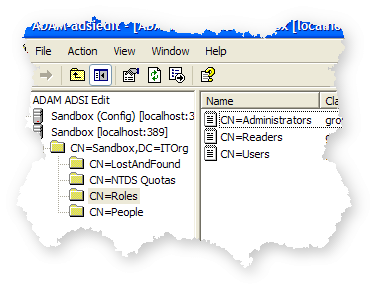
To run ADSIEdit click Start->All Programs->ADAM->ADAM ADSI Edit. You'll see an empty MMC console:
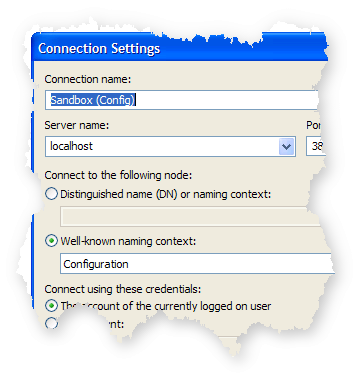
Right-click on ADAM ADSI Edit and select Connect to... Select the Configuration naming context, give this connection a helpful name and click OK.
ADAM uses a separate naming context (also called a "partition") to store settings for that ADAM service instance. Settings here are stored using the exact same mechanism that users, organizational units, computers and groups will be stored in the other partition we created a few minutes ago.
The setting we are looking for is in the object named CN=Directory Service,CN=Windows NT,CN=Services,CN=Configuration,CN={Configuration Naming Context GUID}. The exact name will vary between ADAM instances, but it's always in the same location.

Right-click on the object named CN=Directory Service and click Properties. You are now looking at all of the attributes of the Directory Service object. The attribute in which we are interested is called dsHeuristics. Contrary to its name, this attribute stores security policy, not store heuristics. Change the value of this attribute to 0000000001001 by selecting it, clicking Edit, typing (or pasting in the value 0000000001001) and clicking OK twice.

Now we have modified the configuration of our ADAM directory service instance so that we can give passwords to the users which we are about to create. Let's move on!
Creating new ADAM users
At this point only you can log on to your directory instance, and because your user account is a Windows account
- ADAM won't let you use your network credentials to log on over the generic LDAP interface without SSL and
- you wouldn't want to use your network credentials without SSL anyway because someone could sniff them, compromising not just your directory but also any network resources to which you have access.
We will use use ADSIEdit to create two new users. The first user will be the intital administrator, and the second user will be the service account for the ASP.Net application.
Follow the same steps as above to connect to the directory instance, but this time we will connect to your new naming context (cn=Sandbox,dc=ITOrg) instead of the Configuration naming context. Note that we are still connecting as the current user, i.e. via NTLM as a Windows user.

Now we need to create a container to store our new (and future) users. Navigate to the CN=Sandbox,DC=ITOrg container, right-click on it and select New->Object... Select container and click Next.

Use the name People. Click Next and Finish to create the container.

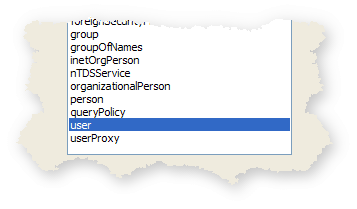
Next, navigate to the CN=People container, right-click on it and select New->Object... Select user and click Next.
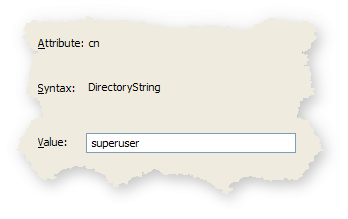
Specify a cn (common name) for your soon-to-be administrator. I used the name superuser.
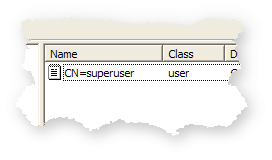
Then click Next and Finish to create the user.
NOTE By default on Windows Server when ADAM users are created they are disabled. To enable a user, change the value of its msDS-UserAccountDisabled attribute to false.
At this point superuser is not very super. She has no permissions at all in the directory and we have not given her a password so she can't even log in. Let's fix the password problem first. Right-click on this user and click Reset Password...

Click OK. Now our superuser can log in, but can't see or do anything. Let's give her some rights by adding her to the Administrators role, which is in the CN=Roles container.
Right-click on CN=Administrators and select Properties. Scroll to the member attribute and edit it. You'll see the security principal picker. There are two things of note here:
- You can add two types of users - Windows and ADAM
- The Administrators group from the Configuration naming context has already been added to this group. For homework, go back to the Configuration naming context and see who is in the Administrators group there.
Click Add ADAM Account... and enter the dn of our superuser (cn=superuser,cn=People,cn=Sandbox,dc=ITOrg)

Next, we will repeat the steps for creating a user to create our service account user. Instead of using superuser, we use ServiceAccount as the user's cn with password p@ssw0rd. Note that we are using the service account user to add new entries in our demo, so we need to add her to the administrative group as well.
Voila! We now have an LDAP user with administrative rights who can bind to our directory using plain text passwords and a service account user who can create new users.
Authenticating with LDAP Client.Net
Since we now have a directory which can be accessed by any LDAP v3 client, let's do just that. We have built a boilerplate ASP.Net application that authenticates using Forms Authentication.
NOTE Forms Authentication is a platform feature of ASP.Net that simplifies building an application with restricted access to selected resources. Specific knowledge of Forms Authentication is not required to follow the remainder of this article (the link provided above is a good starting point for those who want to know more).
There are two tasks required to determine if a user is allowed to access a resource using Forms Authentication
- Verify that user name and password entered are correct
- Verify that user belongs to a role that has access to the desired resource
We will use LDAP Client.Net to perform these tasks. The Authenticate method below validates the user's credentials.
    private bool Authenticate(string username, string password)
    {
 bool authenticated = false;
Instantiate LDAP Client.Net. using (LdapServices.Ldap.Client client = new LdapServices.Ldap.Client())
{
try
{
LdapConnectionConfigurationSection config = LdapConnectionConfigurationSection.Current;
Connect to the directory using the credentials we are trying to authenticate. client.Connect(config.Server, config.Port, username, password);
LdapRoleCache.Current.Remove(username);
authenticated = true;
}
catch (LdapException)
{
An LdapException is thrown if authentication fails using the given username and password. authenticated = false;
}
}
return authenticated;
}
Assuming that the user's credentials have been validated, we need to check which roles the user belong to. The GetRolesForUser method below accomplishes this task.
private string[] GetRolesForUser(string username)
{
string[] roles = LdapRoleCache.Current[username];
if (roles == null)
{
using (LdapServices.Ldap.Client client = new LdapServices.Ldap.Client())
{
LdapConnectionConfigurationSection config = LdapConnectionConfigurationSection.Current;
client.Connect(config.Server, config.Port, config.User, config.Password);
Get all directory entries whose distinguishedName matches our username. There should only be one. LdapServices.Ldap.EntryCollection userEntries = client.Search(
config.BaseDn, "distinguishedName=" + username);
if (userEntries.Count == 1)
{
The memberof attribute contains a collection of groups the entry belongs to. Each group is considered to be a role.
LdapServices.Ldap.Attribute memberOf = userEntries[0].Attributes["memberof"];
roles = new string[memberOf.Values.Count];
for (int i = 0; i < memberOf.Values.Count; i++)
{
string adamGroupName = memberOf.Values[i].StringValue;
roles[i] = adamGroupName.Replace(',', '.');
}
LdapRoleCache.Current[username] = roles;
}
}
}
if (roles == null)
{
roles = new string[] { };
}
return roles;
}
Creating users with LDAP Client.Net
The example above shows how to read data from our directory server. In this example, we will use LDAP Client.Net to create new users, modify their password attribute and add them to roles.
The createButton_Click method below is the event handler for creating a new user in our sample application.
protected void createButton_Click(object sender, EventArgs e)
{
try
{
LdapConnectionConfigurationSection config = LdapConnectionConfigurationSection.Current;
using (LdapServices.Ldap.Client client = new LdapServices.Ldap.Client())
{
client.Connect(config.Server, config.Port, config.User, config.Password);
A NameValueCollection is used to specify the user's attributes. Each entry in this collection corresponds to a single attribute. NameValueCollection attributes = new NameValueCollection();
attributes.Add("objectClass", "user");
string userDn = "cn=" + cnTextBox.Text + "," + config.NewUsersContainerDn;
The AddNewEntry method creates a new user with the specified attributes. LdapServices.Ldap.Entry newUser = client.AddNewEntry(userDn, attributes);
An alternative way to add attributes to an entry is through its Attributes property. newUser.Attributes.Add("userPassword", passwordTextBox.Text);
foreach (ListItem roleListItem in rolesCheckBoxList.Items)
{
if (roleListItem.Selected)
{
The implementation of AddUserToRole is provided below. AddUserToRole(client, config.BaseDn, roleListItem.Value, userDn);
}
}
}
this.cnTextBox.Text = string.Empty;
this.rolesCheckBoxList.Items.Clear();
this.messageLabel.Text = "User created.";
this.messageLabel.Visible = true;
}
catch (LdapException ex)
{
this.messageLabel.Text = ex.ToString();
this.messageLabel.Visible = true;
}
}
The AddUserToRole method factors out the code for adding a user to a role. private void AddUserToRole(LdapServices.Ldap.Client client, string baseDn, string roleDn, string userDn)
{
The user's memberof attribute is read-only, so we have to add the user to the role's member attribute. LdapServices.Ldap.EntryCollection roles = client.Search(baseDn, "distinguishedName=" + roleDn);
LdapServices.Ldap.AttributeCollection roleAttributes = roles[0].Attributes;
LdapServices.Ldap.Attribute memberAttribute = roleAttributes["member"];
If the member attribute exists then we will add the user to it. Otherwise we have to create the attribute. if (memberAttribute != null)
{
memberAttribute.Values.Add(userDn);
}
else
{
roleAttributes.Add("member", userDn);
}
}
Download Source